My Impressions - Crepe Paper Flowers
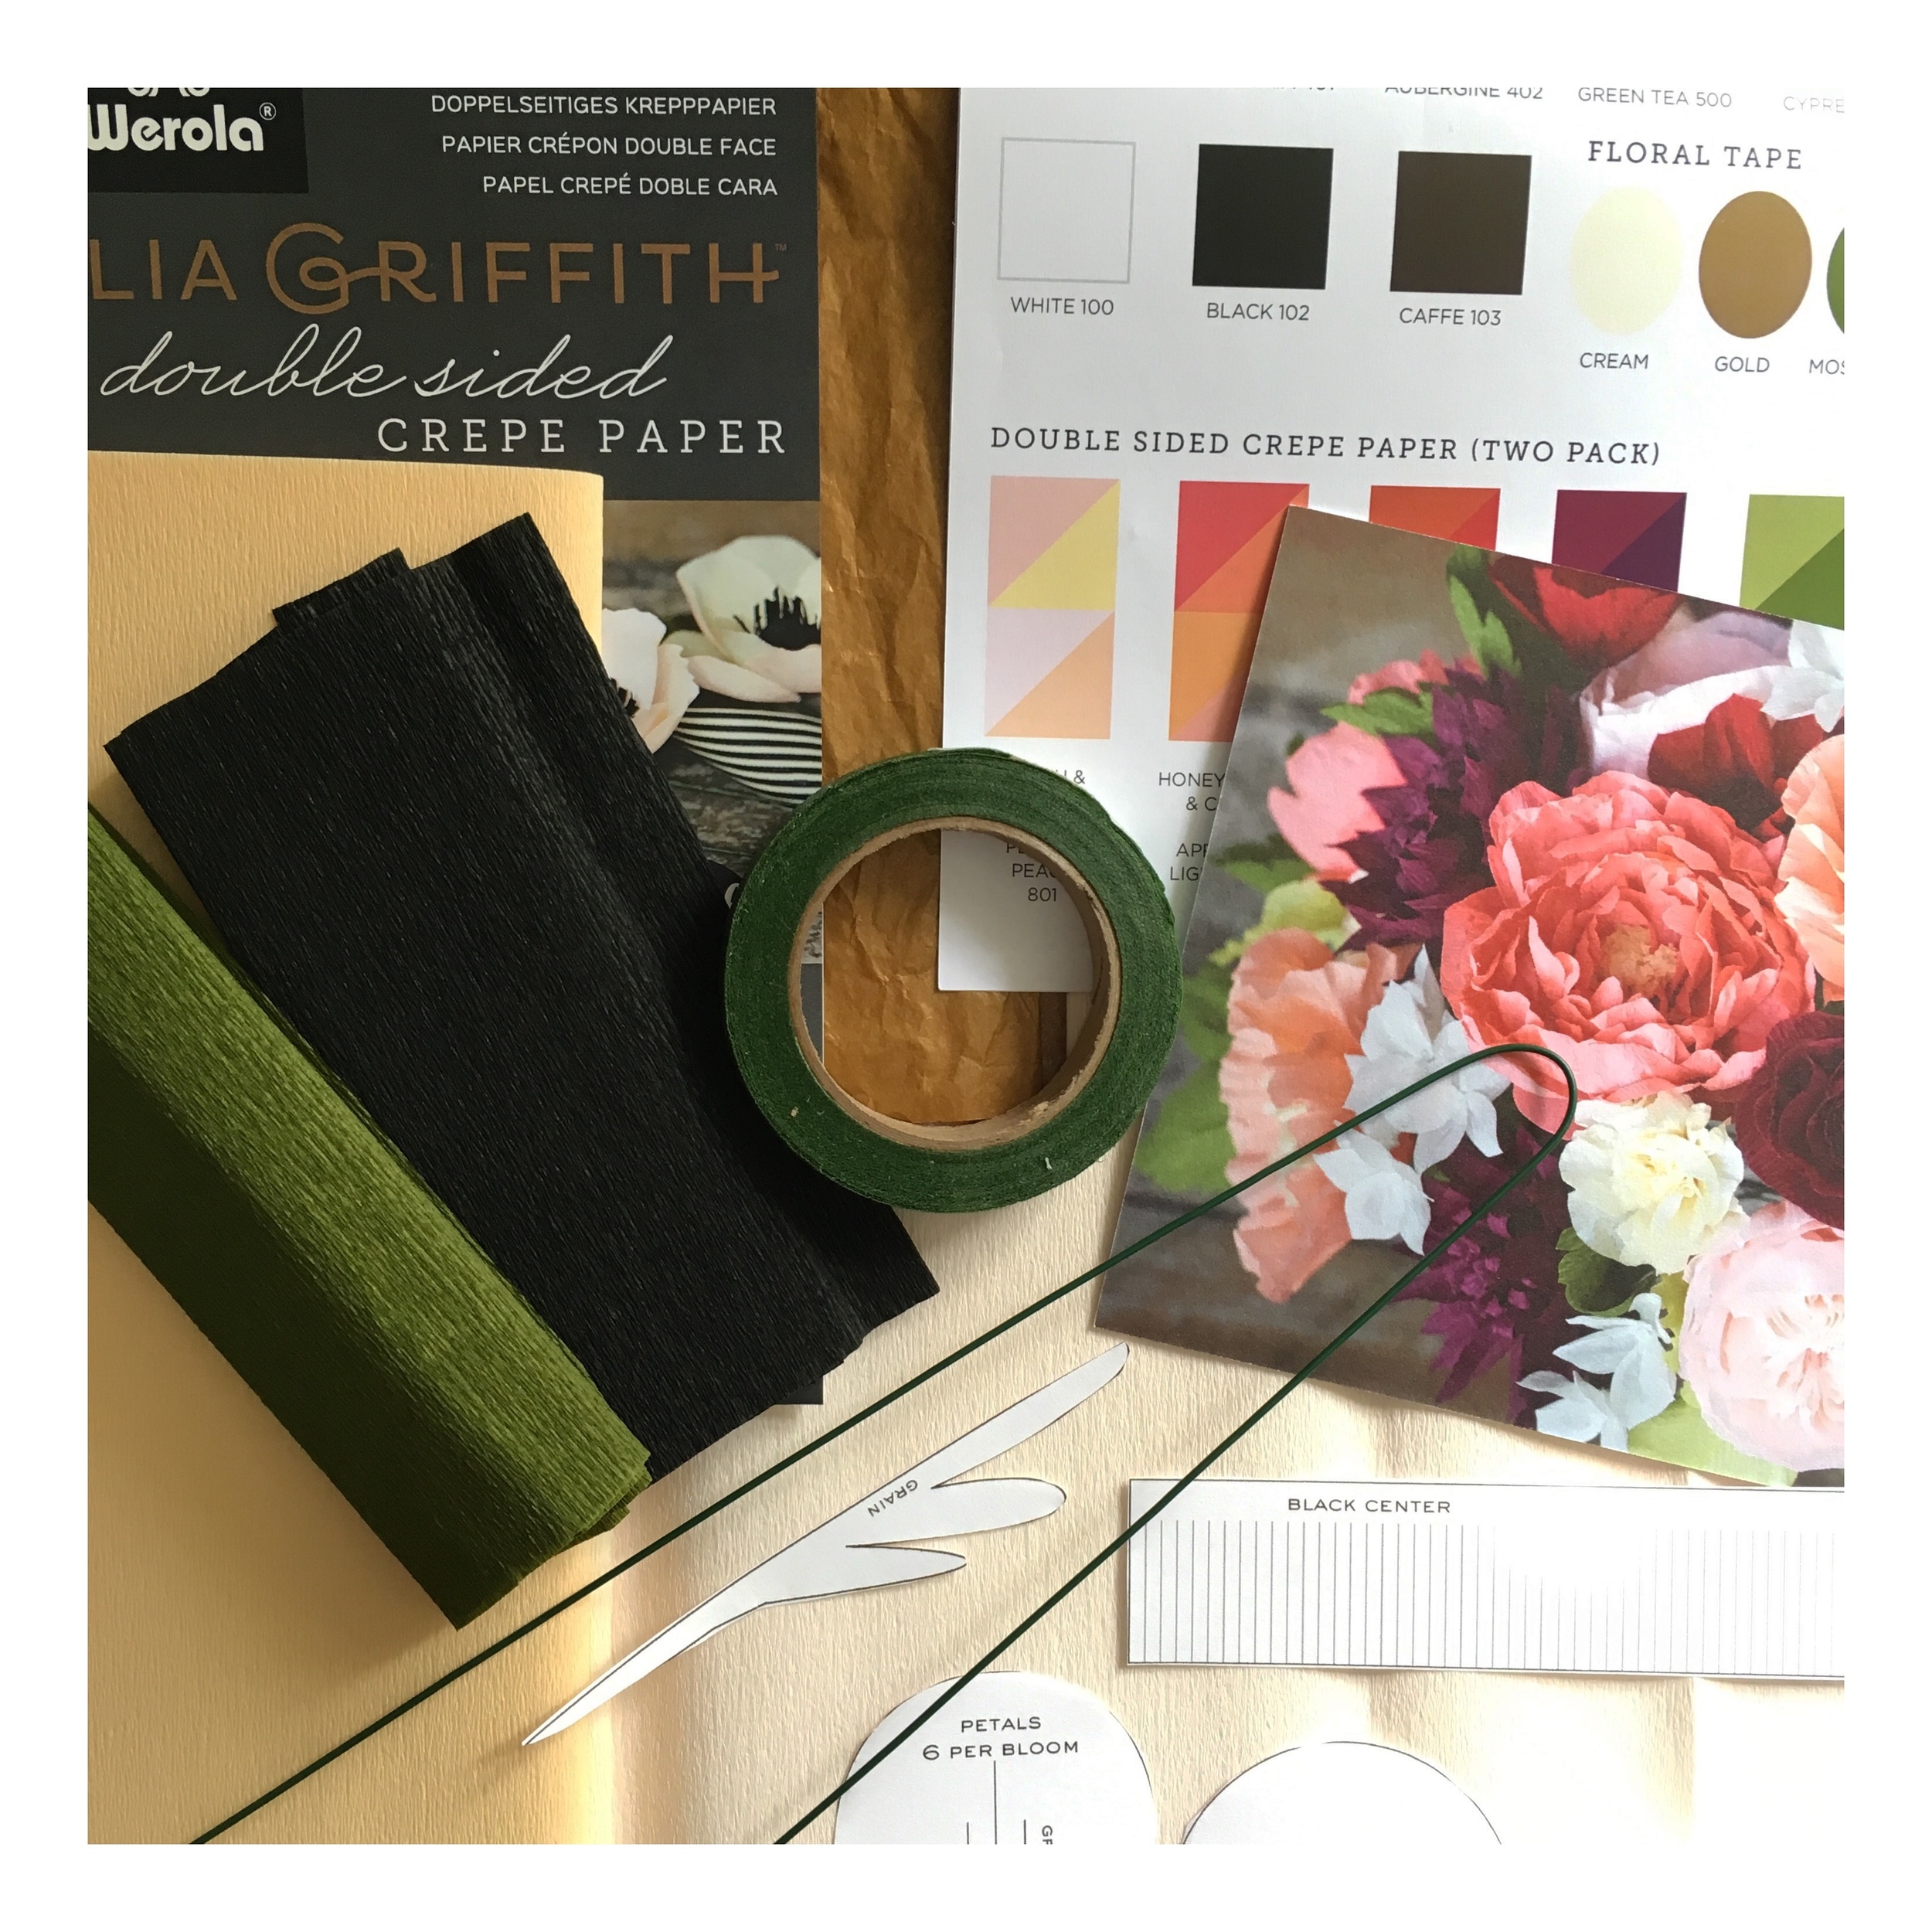
Contents of my swag bag
I recently attended Surtex at the Jacob Javitz Center in New York City, and while I was there, also stopped in to investigate the National Stationary Show.
I was fortunate to catch a presentation of paper flower crafting by Lia Griffith. If you are not familiar with Lia Griffith, I highly recommend you check out her web site - there is inspiration galore, free tutorials, DYI projects and beautiful photos to accompany every post.
In a short 30 minutes, Lia was able to walk the attendees thru the steps needed to "build" a beautiful anemone flower. As an added bonus, each person received a surprise swag bag filled with all of the necessary items needed to make your own crepe paper flower. Score!
If you are not familiar with the art of paper crafting, this crepe paper is not the same kind that is use for birthday party streamers. This crepe paper is in fact designed specifically for crafting projects. Lia Griffith, debuted her own line of crepe paper at the NSS and was the reason behind the demonstration.

Snip snip snip.....
Once back from the show, I could not wait to dive into my bag of goodies and get started on my own paper flower. (For the record - I am not a paper flower expert and have no real knowledge to share other than my opinion. This is also not a sponsored post, just my thoughts about my own experience) The anemone template can be found HERE
Once I downloaded the template I got busy cutting out the various petal and leaf shapes. This first step was fairly straight forward - remember to pay attention to the grain of the paper which makes a difference in how your final flower will look. I used a standard pair of scissors which I found awkward. It was very difficult to get into the small corners and accurately cut around the leaf shapes. I would suggest a smaller pair of scissors, I imagine there are scissors made specifically for this purpose.

Pretty pink petals please.....
With all of my shapes cut out and organized in front of me, the next step is to gently shape your petals. This step requires a bit of practice so it makes sense to cut out additional leaf and petal shapes just for this purpose. If you are local to the Boston area, I would suggest taking a class by Lucia Balcazar. She often holds classes at Greymist Studio in Cambridge. I had taken a paper Peony flower classes last year so the petal shaping was a tad easier the second time around... For a quick explanation of how to shape your leaves/petals click HERE
Tah dah!.....
Next is the assembly of your flower. The pieces of your flower are glued on - you can use traditional glue and apply it sparingly with a toothpick but I found that a glue gun is more accurate and speeds up the process enormously.
Using the floral tape to secure the petals/leaves once attached I found to be the most difficult part of the process. Perhaps my fingers are too long or not that nimble but holding the stem while trying to work around your petals and to neatly wrap the flower base proved to be challenging. Not impossible mind you, just something I had to redo a few times before I was satisfied with the result.
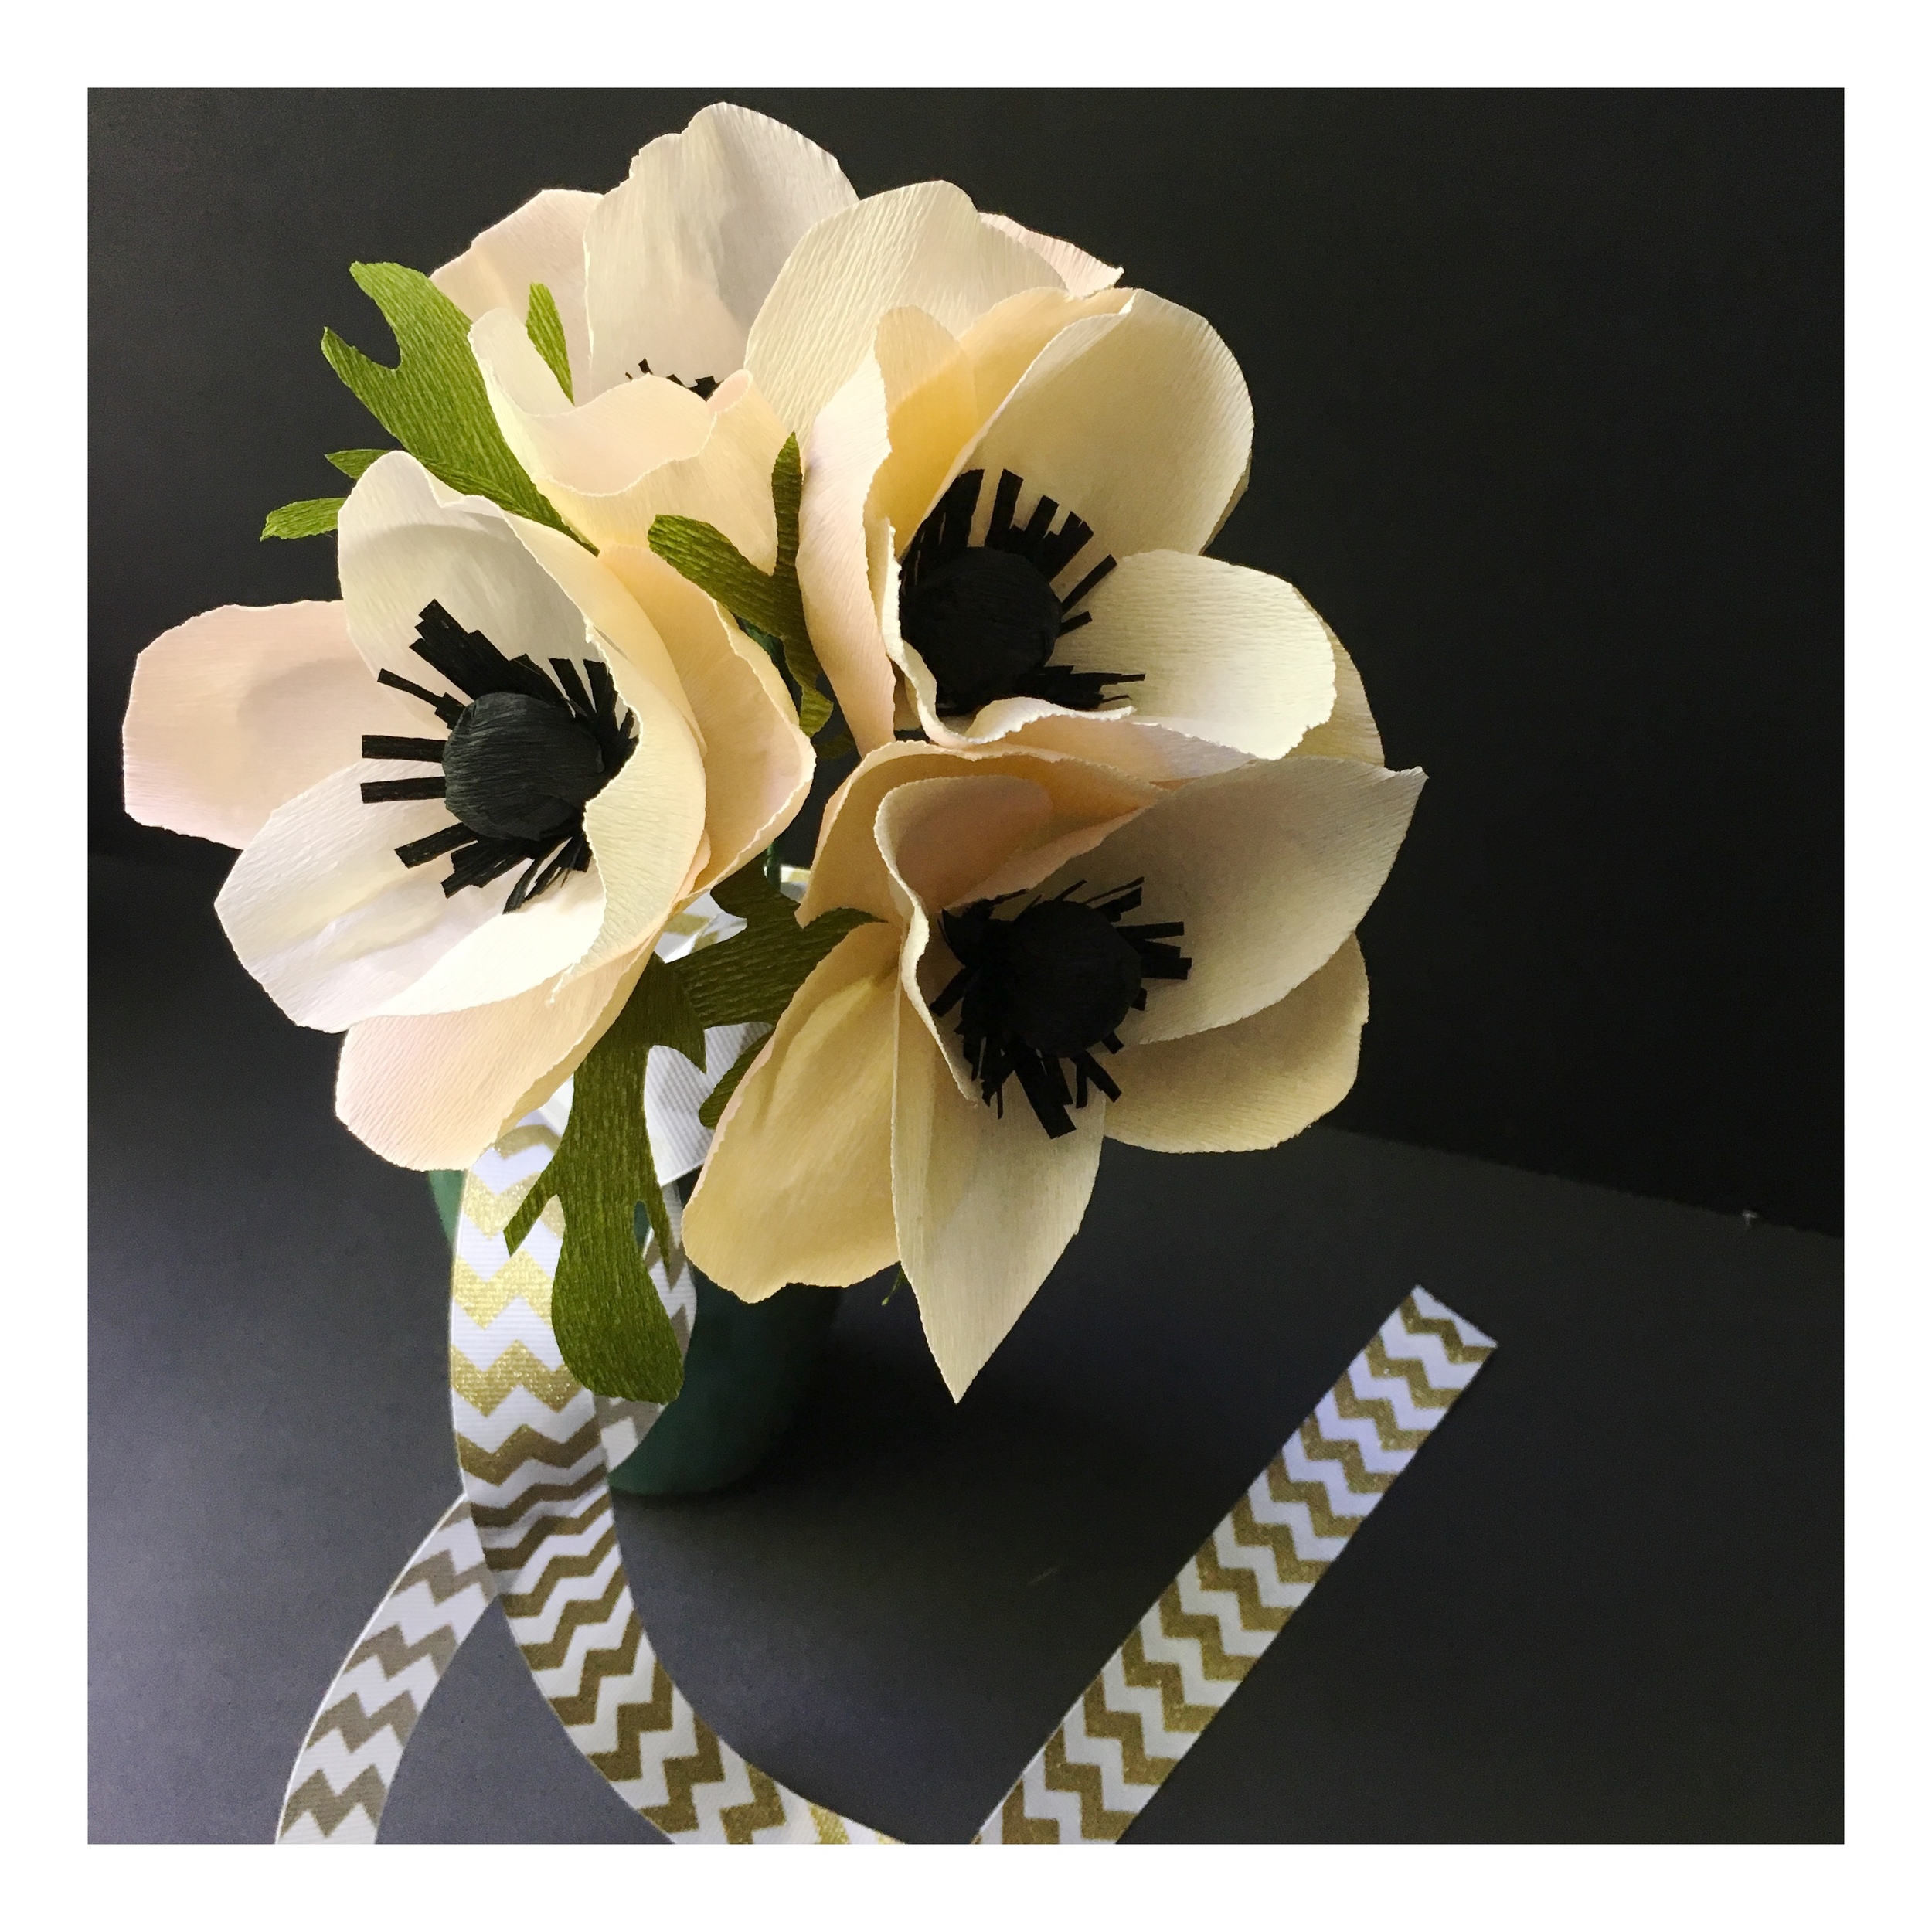
As it is, fortunately all of this takes place "underneath" the flower and is not all that obvious unless you hold up the flower, so the photo above looks pretty good right? Not so much if you actually pick it up...lol
Pay attention as you assemble your flower, look carefully at the photo above, notice the "pointy" petals... The pointy end is attached to the stem and the rounded part of the petal should be visible. I attached these petals "upside down" Oops!
My swag bag included enough product to build these four flowers however I had to improvise the flower centers. My bag included only one 1/2" smoothfoam ball, a very peculiar item and impossible to find at any local craft or art supply store. For my flowers, I improvised and used aluminum foil shaped into a small ball. You can however find the smoothfoam balls online HERE
There are many tutorials available online to take you thru the individual steps, many also will supply materials list and resources. Additionally there are books devoted just to paper flower crafting. I really enjoyed the process and am excited to learn more. If you are a paper flower crafter, I would love to hear of some good book suggestions.